Setup wizard
On this page
- 1. Create a clinic
- 2. Setup twilio phone number
- 3. Setup mailgun
- 4. Set default email sender
- 5. Create a branch
- 6. Create / clone treatment categories
- 7. Create / clone treatments
- Add new treatment
- 8. Create an injector/ provider
- 9. Create clinic staff
- 10. Activate treatments
- 11. Activate treatments categories
- 13. Activate branch
- 14. Activate clinic
- 15. Create schedule
Congratulations! You joined MedspaCircle as a clinic owner.
As a clinic owner, you can setup your medspa through following the “setup wizard” that you'll see at the top of every page. It will guide you to understand step by step setup to make your medspa up and running.
Click on every link to open the related setup page. If you have done on a particular part, the arrow would become green. The blue arrow indicates the current step that you are seeing.
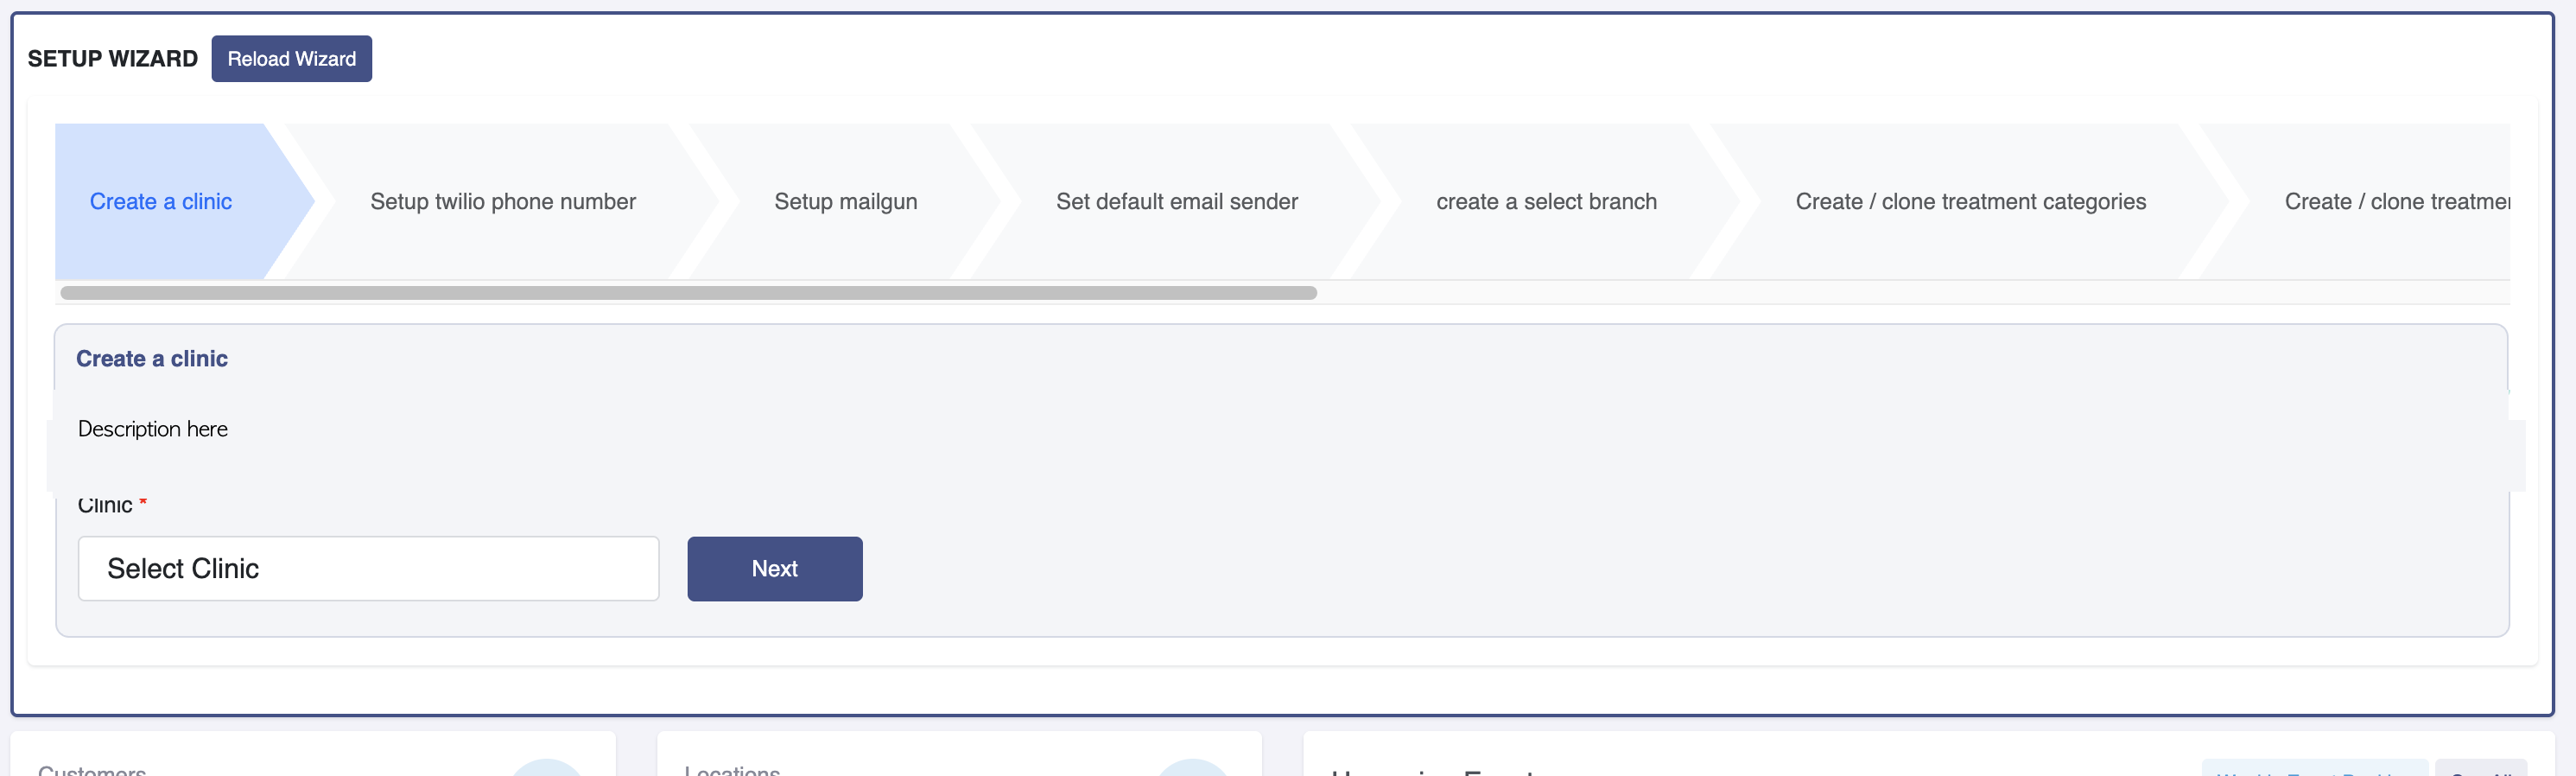
The steps would be:
1. Create a clinic
When you are on clinics page, you will see all clinics that you have. For the first time, you'll need to add a clinic by clicking “Create New Clinic” button on the right top corner.
After you click it, a pop up will appear, and you need to fill them up.
There are some fields that can be auto populated by clicking “fill with default values”, a blue on the popup header. Click it to fill the form with the default values. However, you still need to fill the other fields by yourself, such as:
Notification email:
recommended value is noreply@yourdomain.com. for example: noreply@parkmedspa.com.
This notification email will be used for sending emails like automation emails.
Square App Id
Our system is using square as the payment processor. To get Square app id, please follow this tutorial.
Upload logo & header logo
Please select your logo & header logo. You can use png, jpb, or webp image format.
Linktree
If you don't have a link tree, you can put “-” sign there.
Main website url
This is your clinic's domain, like parkmedspa.com. This main website url should be the same domain with notification email. If your notification email is noreply@parkmedspa.com, your main website url should be parkmedspa.com.
Customer domain
You can put go.medspacircle.com
Slug
This is the website's slug. It is better if your website slug is your domain name without the “.com” or “.net”.
for example: if your website is parkmedspa.com, your website slug can be parkmedspa.
Pleaes note that this slug can not be changed later.
The rest of the form can be filled later.
Alternative Clinic(s) if shutted down
You can leave it alone
Additional Header Code (before </head> tag)
This code will be placed before the closing head tag. You can put google tag here.
Additional Body Code (after <body> tag)
This code will be placed after the opening body tag.
Facebook pixel id
This is where you put your facebook pixel id.
Facebook access token
This is where you put your facebook access token.
GA4 id
This is where you put Google Analytics ID
GTM
This is where you put Google Tag Manager ID
Share Phone Book (available in edit clinic mode)
If someone that is not registered as a patient call your twilio phone number, it will be listed on your phone book tab in Conversation menu. If you want to share those contacts to other clinic, activate this setting, otherwise, please let it inactive.
Use point system (available in edit clinic mode)
If you want to use point system, please activate this option. When you are using point system, you can set:
- Auto partner: if you turn this on, every single patient is a partner. Partners are the customers that would get points. If you turn it off, you need to select who's gonna get points one by one.
- Point Per Referral Code (upline) : how many points the upline would get after she refers someone, and the referral treated.
- How many points user will get after they spend each dollar
- Sign up point (for first time user)
- How many points customer should use in checkout to be equal to $1
- Cash out setting (How many points to get $1)
- Minimum downline's transaction after discount, for upline to get points
App Settings Clinic's Banner
This banner will be placed on MedspaCircle Apps.
2. Setup twilio phone number
We're using twilio phone number to communicate with patients. To add a new twilio phone number, please do the following:
- Search for a phone number
You can search by your area code. like 619 and then click search. Then choose one of them by clicking buy button - Choose emergency address
Please choose Jay Park MD, 2292 Faraday Ave Suite 100, Carlsbad, CA 92008 - Select message service
Please choose Send Bulk MedspaCircle. There are so many message services, please choose it carefully.
3. Setup mailgun
We're using mailgun to send and receive emails.
To setup the mailgun, please make sure that your domain has been added to AWS route 53. If you dont know about its status, please contact martin.armunanto@medspacircle.com. After your domain has been added into AWS route 53, you can continue to setup mailgun as the following:
- Make sure your main website address is correct and your notification email from previous step is correct.
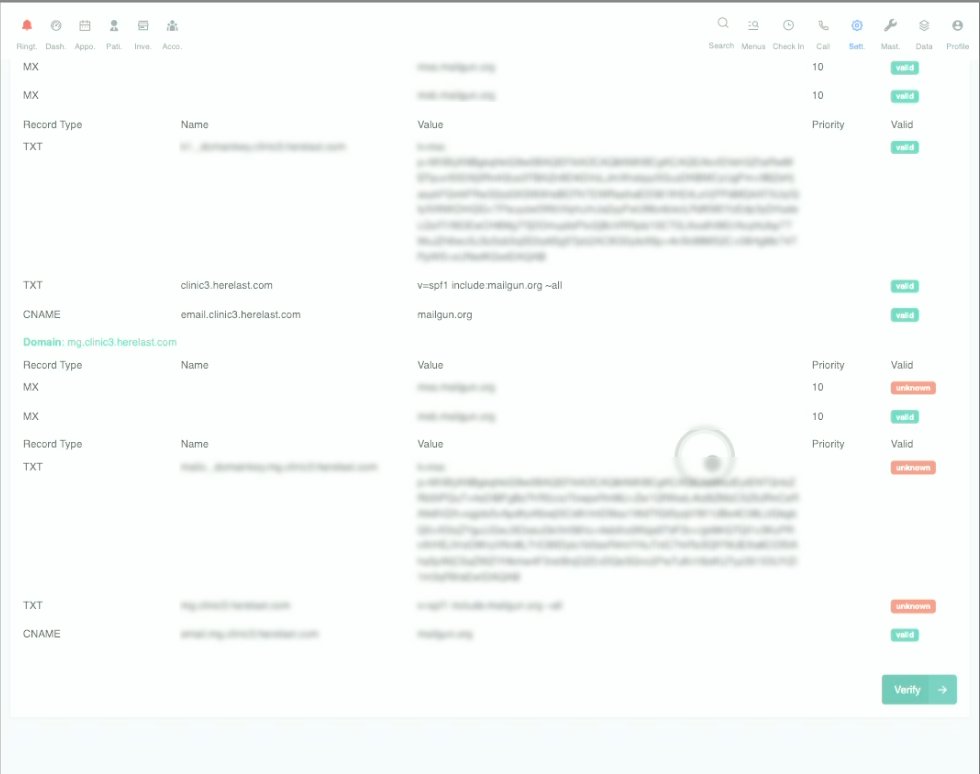
- Click submit, and you will see the DNS record update page.
- Click publish records on AWS once only, and then wait for about 1 minute. This is the DNS propagation time.
- After about 1 minute, scroll to the bottom, and click verify button.
- If your domain has been verified, you will see all of the DNS records are green and valid.
If you still see red buttons, please wait for some minutes and try to click verify button once again.
4. Set default email sender
After the mailgun setup is successful, you can add your email addresses.
Start from noreply@yourdomain.com (remember we have specified this notification email when we create a clinic at the beginning, so we need to create it here). After you have created your needed emails, please make sure that you have selected default sender email.
5. Create a branch
To create a branch, click “add new branch” on the top right corner and fill all fields.
- Branch name is your branch's name
- Slug is your branch's slug. Please use no spaces or special characters like # ! @ ^ &
- State & City are where your branch is located
- Stripe credential: you can leave it alone
- Address is your branch's address. After you fill it up, please click "locate in map" button, the map marker beneath will showing your branch's location. Fine tune the marker by dragging it.
- Free text is the text that will be shown in your branch's page. You can put your promotional text there.
- Link to post google review
This is the link for google post review. Google reviews will bost your business, that's why we need it.
If you have a google business page, you can click “place id finder” and a new page will be opened.
From there, you can search your business name, and after you select your business, you will see Place ID field is filled out.
click the copy icon to copy the google place id, and go back to the previous page (create a new branch page).
Fill the link for google post review with that value. - Choose 1 specific injector/ provider to book.
This setting is useful if you want a patient book with 1 injector/ provider only (not mixing injector/ provider in 1 appoitment). Check it to activate it. If you activate this, a patient will need to select an injector/ provider when she select a treatment. - Auto cancel appointment if deposit is not paid.
if you need to get a deposit from a certain treatments, please check this. You can specify how long the system to wait the patient until she pays the deposit. If she didn't pay the deposit for that x time, the system will cancel the appoitment automatically. - Upload logo & header logo
Select your branch's logo & header logo - App Settings
This settings are for MC Customer App. you can specify customer service phone number and branch's dessription
6. Create / clone treatment categories
Before we create a treatment, we need at least 1 treatment category. You can:
- Create your own category
Click “add new category” - Clone from our existing treatment category.
Click “Clone from master”
7. Create / clone treatments
If you previously clicked “clone from master” you probably have treatments already. But if you still dont have any treatment, please click “add new treatment”.
After you create treatments, you can create a combination treatments. It is to combine treatments into 1 “package”, so your customers should not be wonder to get the recommended treatments package.
Add new treatment
If you click “add new treatment” you will see a new pop up. Fill all required fields to add a new treatment.
- Treatment injection type
This is the “injection type” that specify your treatment. Let's say you want to have Xeomin injection type, but want to show it as "NewTox" to your customers, You need to select xeomin as the treatment injection type. - Treatment pointer
This is the pointer when you need to move the appointment to another location. You can move the appointment to another location that has the same treatment pointer. - Treatment's consent form
Please specify which consent form you want to use for your treatment. You can use master consent form, or you can create your own consent form. - Treatment Name
The name of your treatment - Treatment initial
The initial that will be shown on appointment calendar, so you can view your treatments from a higher level. - Treatment description
the description of your treatment - Treatment duration (minutes)
How long your treatment will be - How many days customer should be re-treated?
This is to remind your customer to be re-treated, so they would know they need to see you again - Deposit
The amount of money that you required before the customer comes for the treatment. - Tax setting
The default tax is inherit from the treatment category, if the treatment category says 10%, your treatment tax will follow. But if you want to change the tax, please activate custom tax rule.
8. Create an injector/ provider
To create an injector/ provider account, please go to injectors/ providers page and click add injector button.
You'll need to specify first name, last name, title, phone number, email and password.
And don't forget to select accessible clinic(s). If you don't specify them, the injector/ provider would not be able to treat the customers.
9. Create clinic staff
To create an clinic staff, please click go to clinic staffs page add clinic staff button.
You'll need to specify first name, last name, title, phone number, email and password.
And dont' forget to select accessible clinic(s), email(s), and phone number(s).
10. Activate treatments
Please go to treatments page under a treatment category and activate it one by one. A treatment should have at least 1 injector/ provider assigned to it.
11. Activate treatments categories
After you activate the treatments, please go to the treatment categories and activate the categories.
13. Activate branch
After you activate the treatment categories, please go to the branch list and activate the branch.
14. Activate clinic
after you activate the branch, please go to the clinic list and activate the clinic.
15. Create schedule
You can create a schedule now.